The vibration table for casting is a critical tool for improving mold compaction, reducing air entrapment, and helping complex castings fill more evenly. When casting geometry includes thin walls, deep pockets, blind cavities, or sharp transitions, the wrong table setup can cause segregation, surface defects, or incomplete filling. This article explains how to match vibration tables with complex casting geometry using practical steps, engineering selection criteria, and implementation guidance for foundry and manufacturing teams. It also includes SEO-oriented article outlines, content strategy insights, and actionable optimization tips for production environments.
Six Article Outline Ideas for the Topic
Guide to Matching Vibration Tables with Complex Casting Geometry
- Map the geometry of the part before selecting vibration settings.
- Identify thin walls, narrow ribs, internal cores, pockets, undercuts, and wall thickness transitions.
- Rate each area by sensitivity to trapped air, uneven densification, or local collapse.
- Use this geometry map to decide where the table must transmit energy and where it must avoid over-vibration.
For complex castings, the goal is not maximum vibration. The goal is controlled energy delivery to improve mold compaction without disturbing the material structure.
1. Start with the Casting Geometry, Not the Machine
- Include the mold, flask, core boxes, fixtures, and any auxiliary supports in total load calculation.
- Choose a table with enough surface area to keep the mold fully supported.
- Verify dynamic load rating, not just static weight limit.
- Allow margin for uneven mass distribution in asymmetrical castings.
If the casting is long, tall, or off-center, the table must resist tipping and maintain uniform vibration transmission across the mold footprint.
2. Match Table Size and Load Capacity to the Full Casting Setup
- Lower frequency with higher amplitude may help mobilize heavier or more viscous mold systems.
- Higher frequency with lower amplitude can be useful for delicate sections and finer compaction control.
- Complex geometry often needs segmented tuning rather than one universal setting.
- Test settings in small increments and document the effect on fill quality and surface finish.
In practice, frequency and amplitude should be selected based on the casting process, mold media, and the risk of segregation or part distortion.
3. Use Frequency and Amplitude as Geometry-Specific Variables
- Vertical vibration is common for compaction and air release.
- Horizontal or multi-axis motion may help in specialized setups where mold flow paths are uneven.
- Use isolation and guide structures to prevent wasted energy and unwanted resonance.
- Ensure the mold sits flat and the force path is repeatable from cycle to cycle.
For complicated castings, uneven vibration pathways can create local over-compaction in one area and under-compaction in another.
4. Control Vibration Direction and Transmission Path
- Sand mold systems, investment casting shells, plaster molds, and specialty ceramic molds all respond differently to vibration.
- More fragile materials require gentler amplitude and tighter control of ramp-up time.
- Heavier media may require stronger energy input to eliminate trapped air.
- Always align vibration settings with the rheology or consolidation behavior of the casting material.
5. Reduce Defects by Matching Vibration to Material Behavior
- Measure the total mold assembly weight including fixtures and accessories.
- Inspect geometry risk zones such as thin ribs, blind cavities, and deep pockets.
- Select a table size that provides full support and balanced loading.
- Set a baseline frequency and amplitude according to the mold/media type.
- Run a short test cycle and inspect fill quality, air release, and compaction.
- Adjust one variable at a time to isolate the effect of frequency, amplitude, or duration.
- Record the final process window for repeatability and quality control.
6. Use a Step-by-Step Setup Workflow You Can Implement Immediately
- Inspect mold settlement before pouring.
- Check for vibration-induced segregation in the mold media.
- Evaluate surface finish, porosity, voids, and dimensional deviation after casting.
- Track defect trends by geometry type to improve future settings.
Over time, quality data helps establish a preferred vibration profile for each class of casting geometry.
7. Build a Quality Control Checkpoint for Every Casting Run
- Consult publicly available references from engineering education and industrial standards organizations when setting process parameters.
- Use foundry process white papers and equipment manufacturer application notes to benchmark acceptable vibration ranges.
- Cross-check against process guidance from authoritative technical sources such as university materials departments and industry associations.
For example, engineering departments and materials science programs at universities often publish guidance on vibration, compaction, and mold behavior, while industry organizations provide practical manufacturing benchmarks for process control.
8. Use Evidence-Based Engineering Principles
- Variable speed control for tuning frequency.
- Adjustable amplitude for delicate versus robust molds.
- Programmable cycle timing to standardize the vibration sequence.
- Heavy-duty platform stiffness to prevent energy loss.
- Isolation mounts to reduce floor transmission and improve stability.
- Digital monitoring for repeatable quality and traceability.
9. Recommended Machine Features for Complex Casting Work
- Air pockets in deep cavities: increase compaction consistency and extend vibration duration slightly.
- Surface roughness: reduce excessive amplitude and check mold media stability.
- Segregation or settlement: lower vibration intensity and verify frequency compatibility.
- Incomplete fill: inspect mold venting, vibration path, and pouring method together.
- Cracking in fragile sections: reduce acceleration and use a softer startup profile.
10. Practical Defect Troubleshooting for Complex Geometry
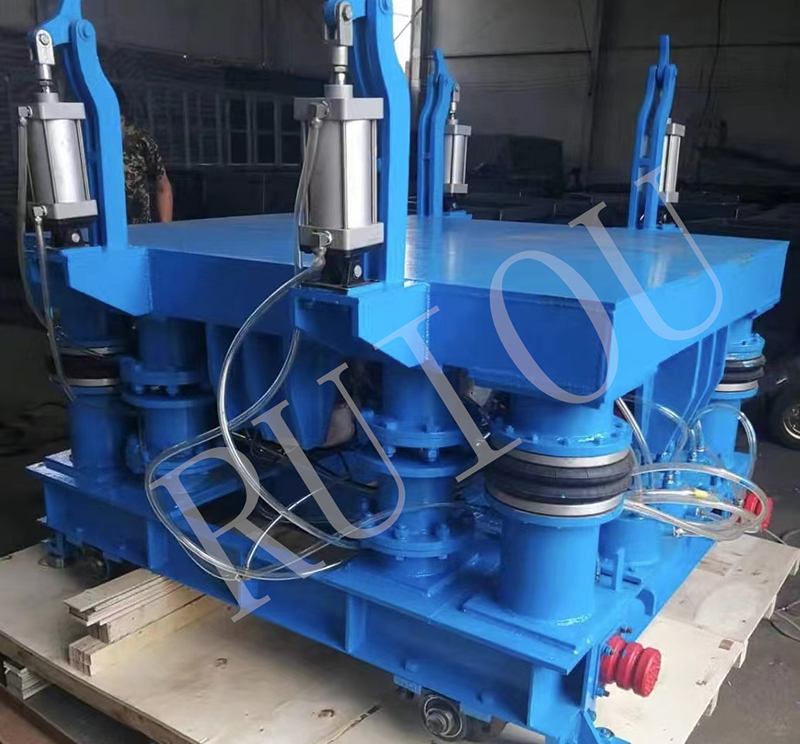
Use the following product image as a reference point for industrial presentation and equipment context:
11. Visual Reference for Casting Operations
12. Why Ruiou Solutions Matter in Casting Workflows
- Ruiou-style industrial vibration solutions can support consistent mold settling in demanding casting environments.
- When evaluating a supplier, check structure rigidity, control precision, and customization options for your geometry range.
- Ask whether the system can be configured for different mold sizes, media types, and cycle profiles.
- Confirm maintenance accessibility and long-term stability for production use.
13. SEO Article Expansion Points That Strengthen Coverage
- Include exact use cases such as sand casting, investment casting, and core compaction.
- Add a comparison table of low, medium, and high vibration intensity settings.
- Explain how to avoid over-vibration and under-vibration.
- Describe how to document repeatable settings for quality assurance.
- Answer buyer questions about size, load, and maintenance.
14. Key Points Commonly Missed in Vibration Table Selection
- Dynamic imbalance: asymmetrical castings can shift the center of mass and distort vibration transmission.
- Ramp-up behavior: gradual acceleration can protect fragile molds better than instant full power.
- Table stiffness: a weak platform can absorb energy and create inconsistent results.
- Operator repeatability: standard work instructions are essential for process consistency.
- Maintenance condition: worn bearings, loose fasteners, or damaged mounts can change the effective vibration profile.
- Measurement discipline: process improvement depends on recording settings, outcomes, and defect patterns.